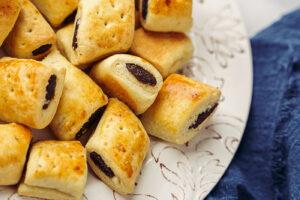
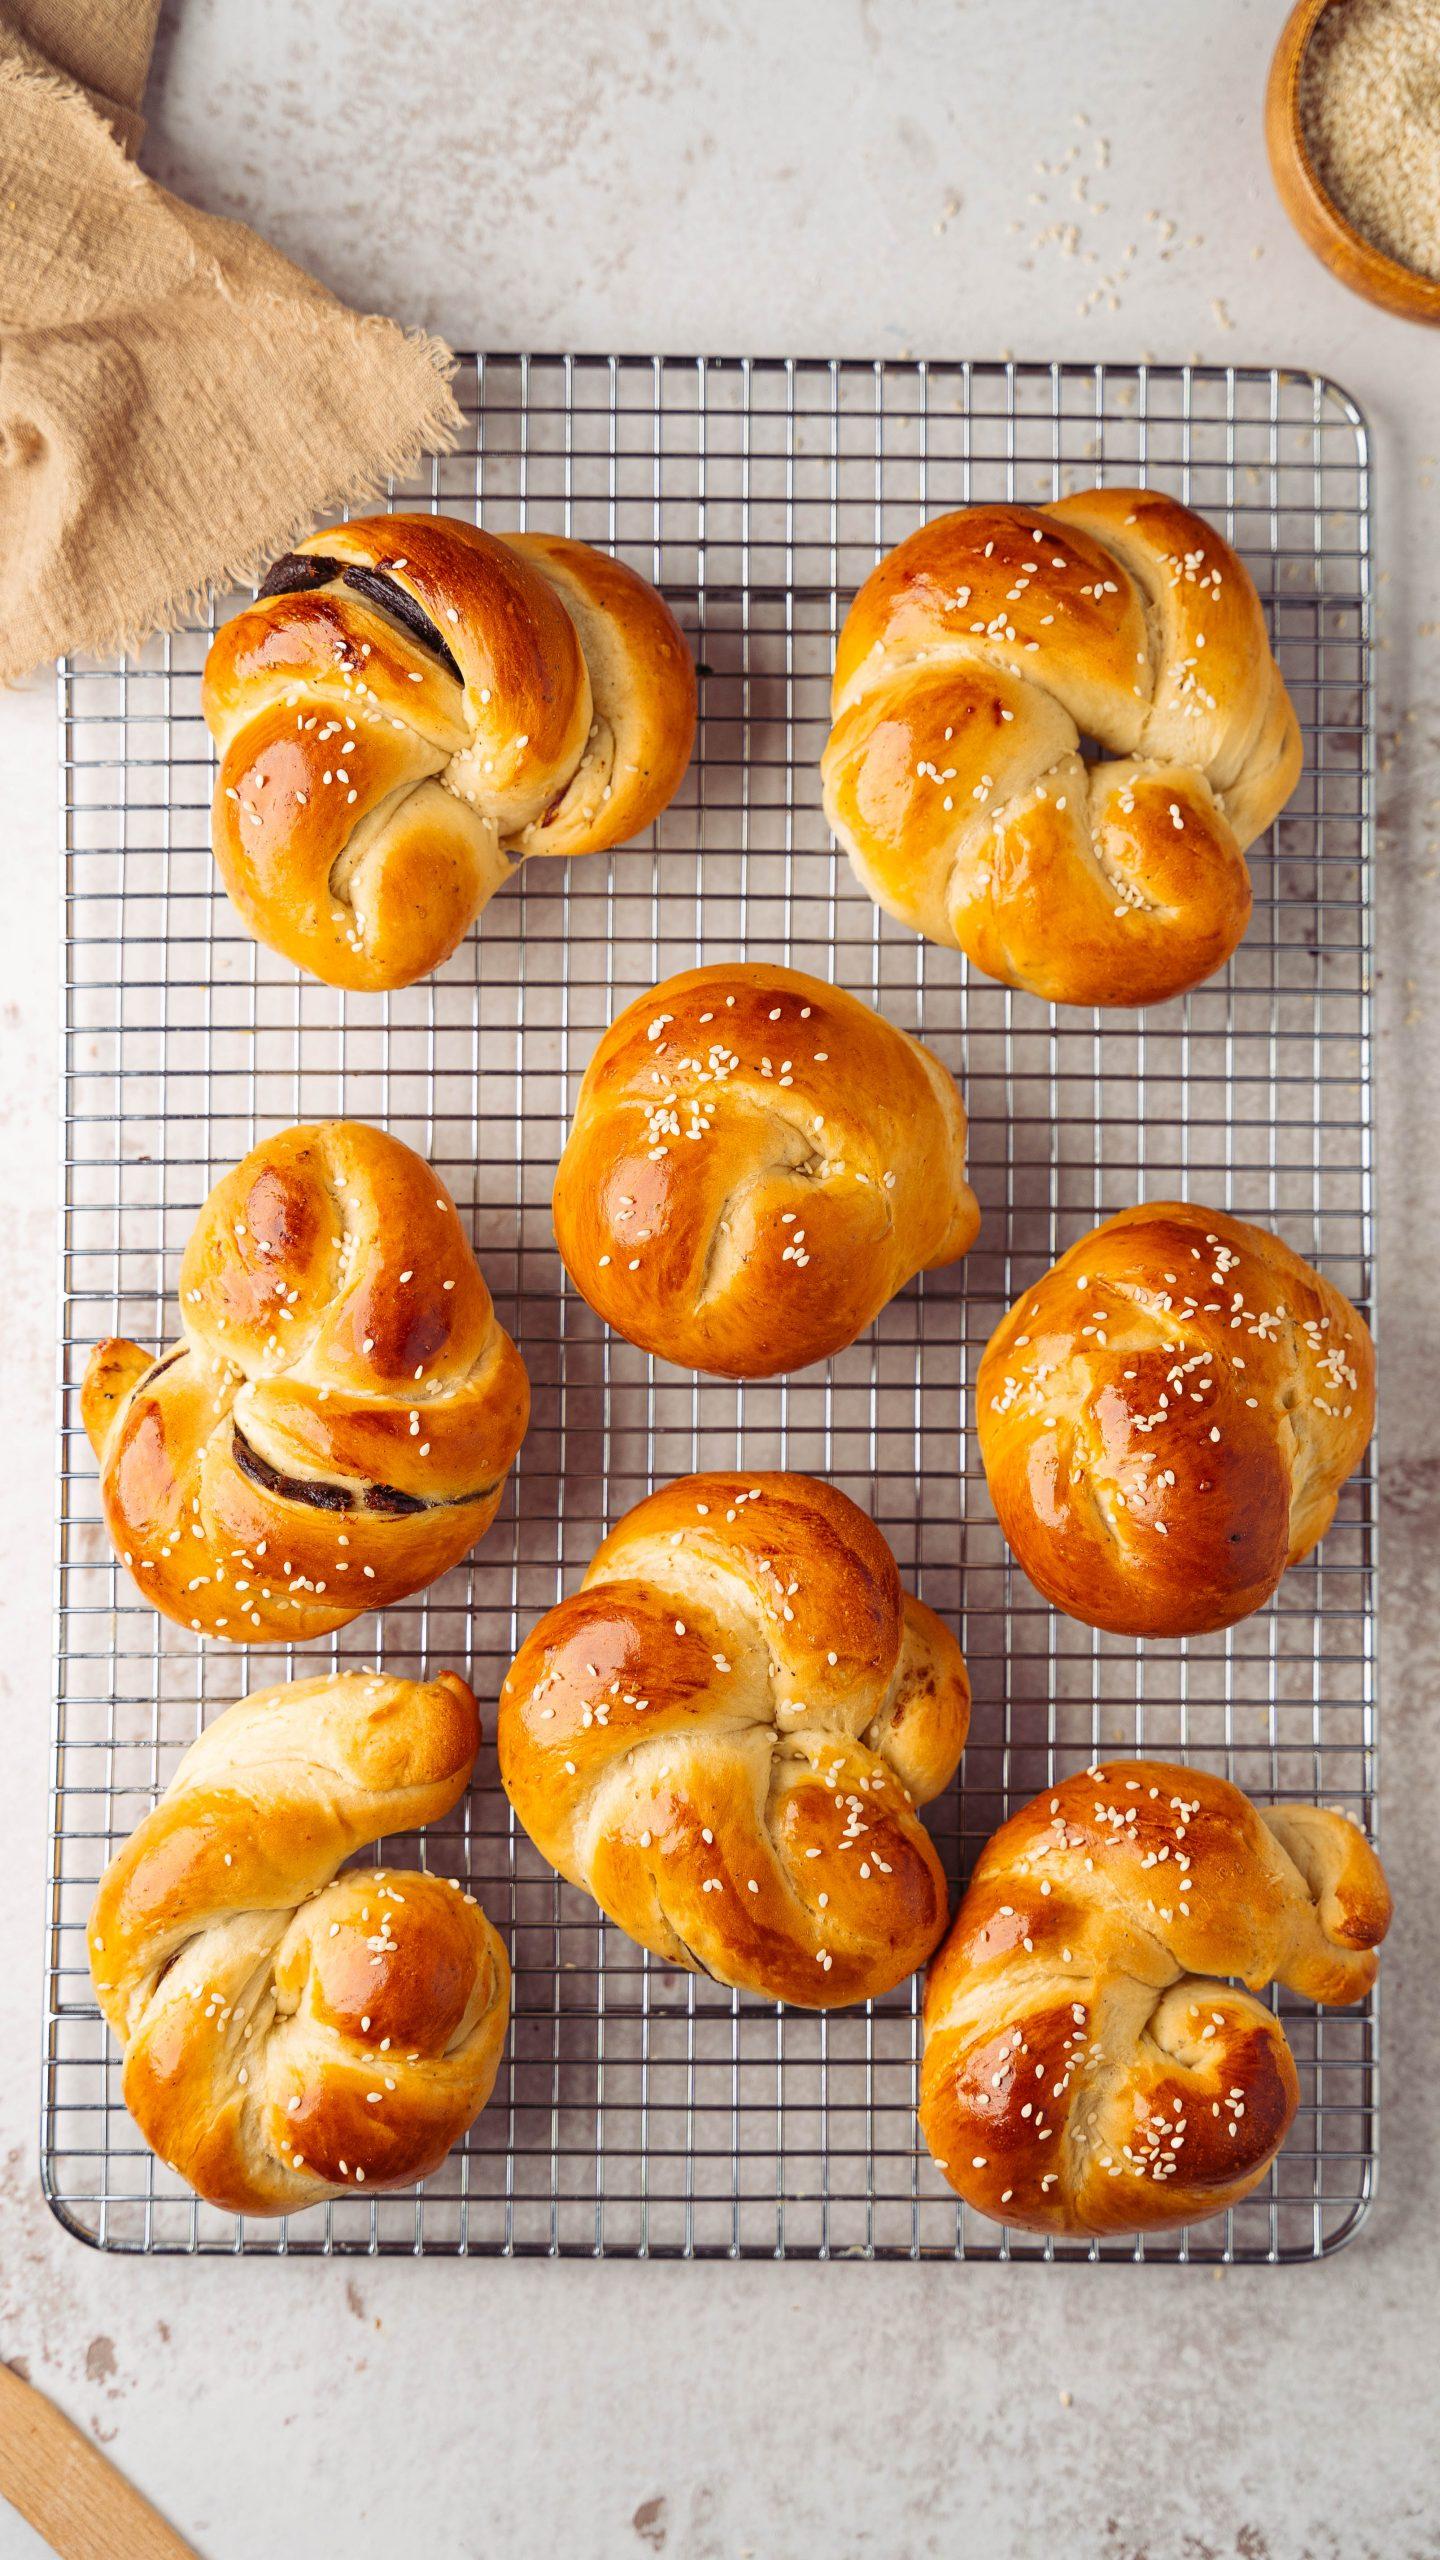
When discussing traditional Iraqi cuisine, this Authentic Choereg stands out as a delightful representation of family memories, timeless recipes, and cherished gatherings. This sweet bread, sometimes enveloped with a date paste core, is an integral accompaniment to afternoon tea sessions in many Iraqi households.
What is Choereg?
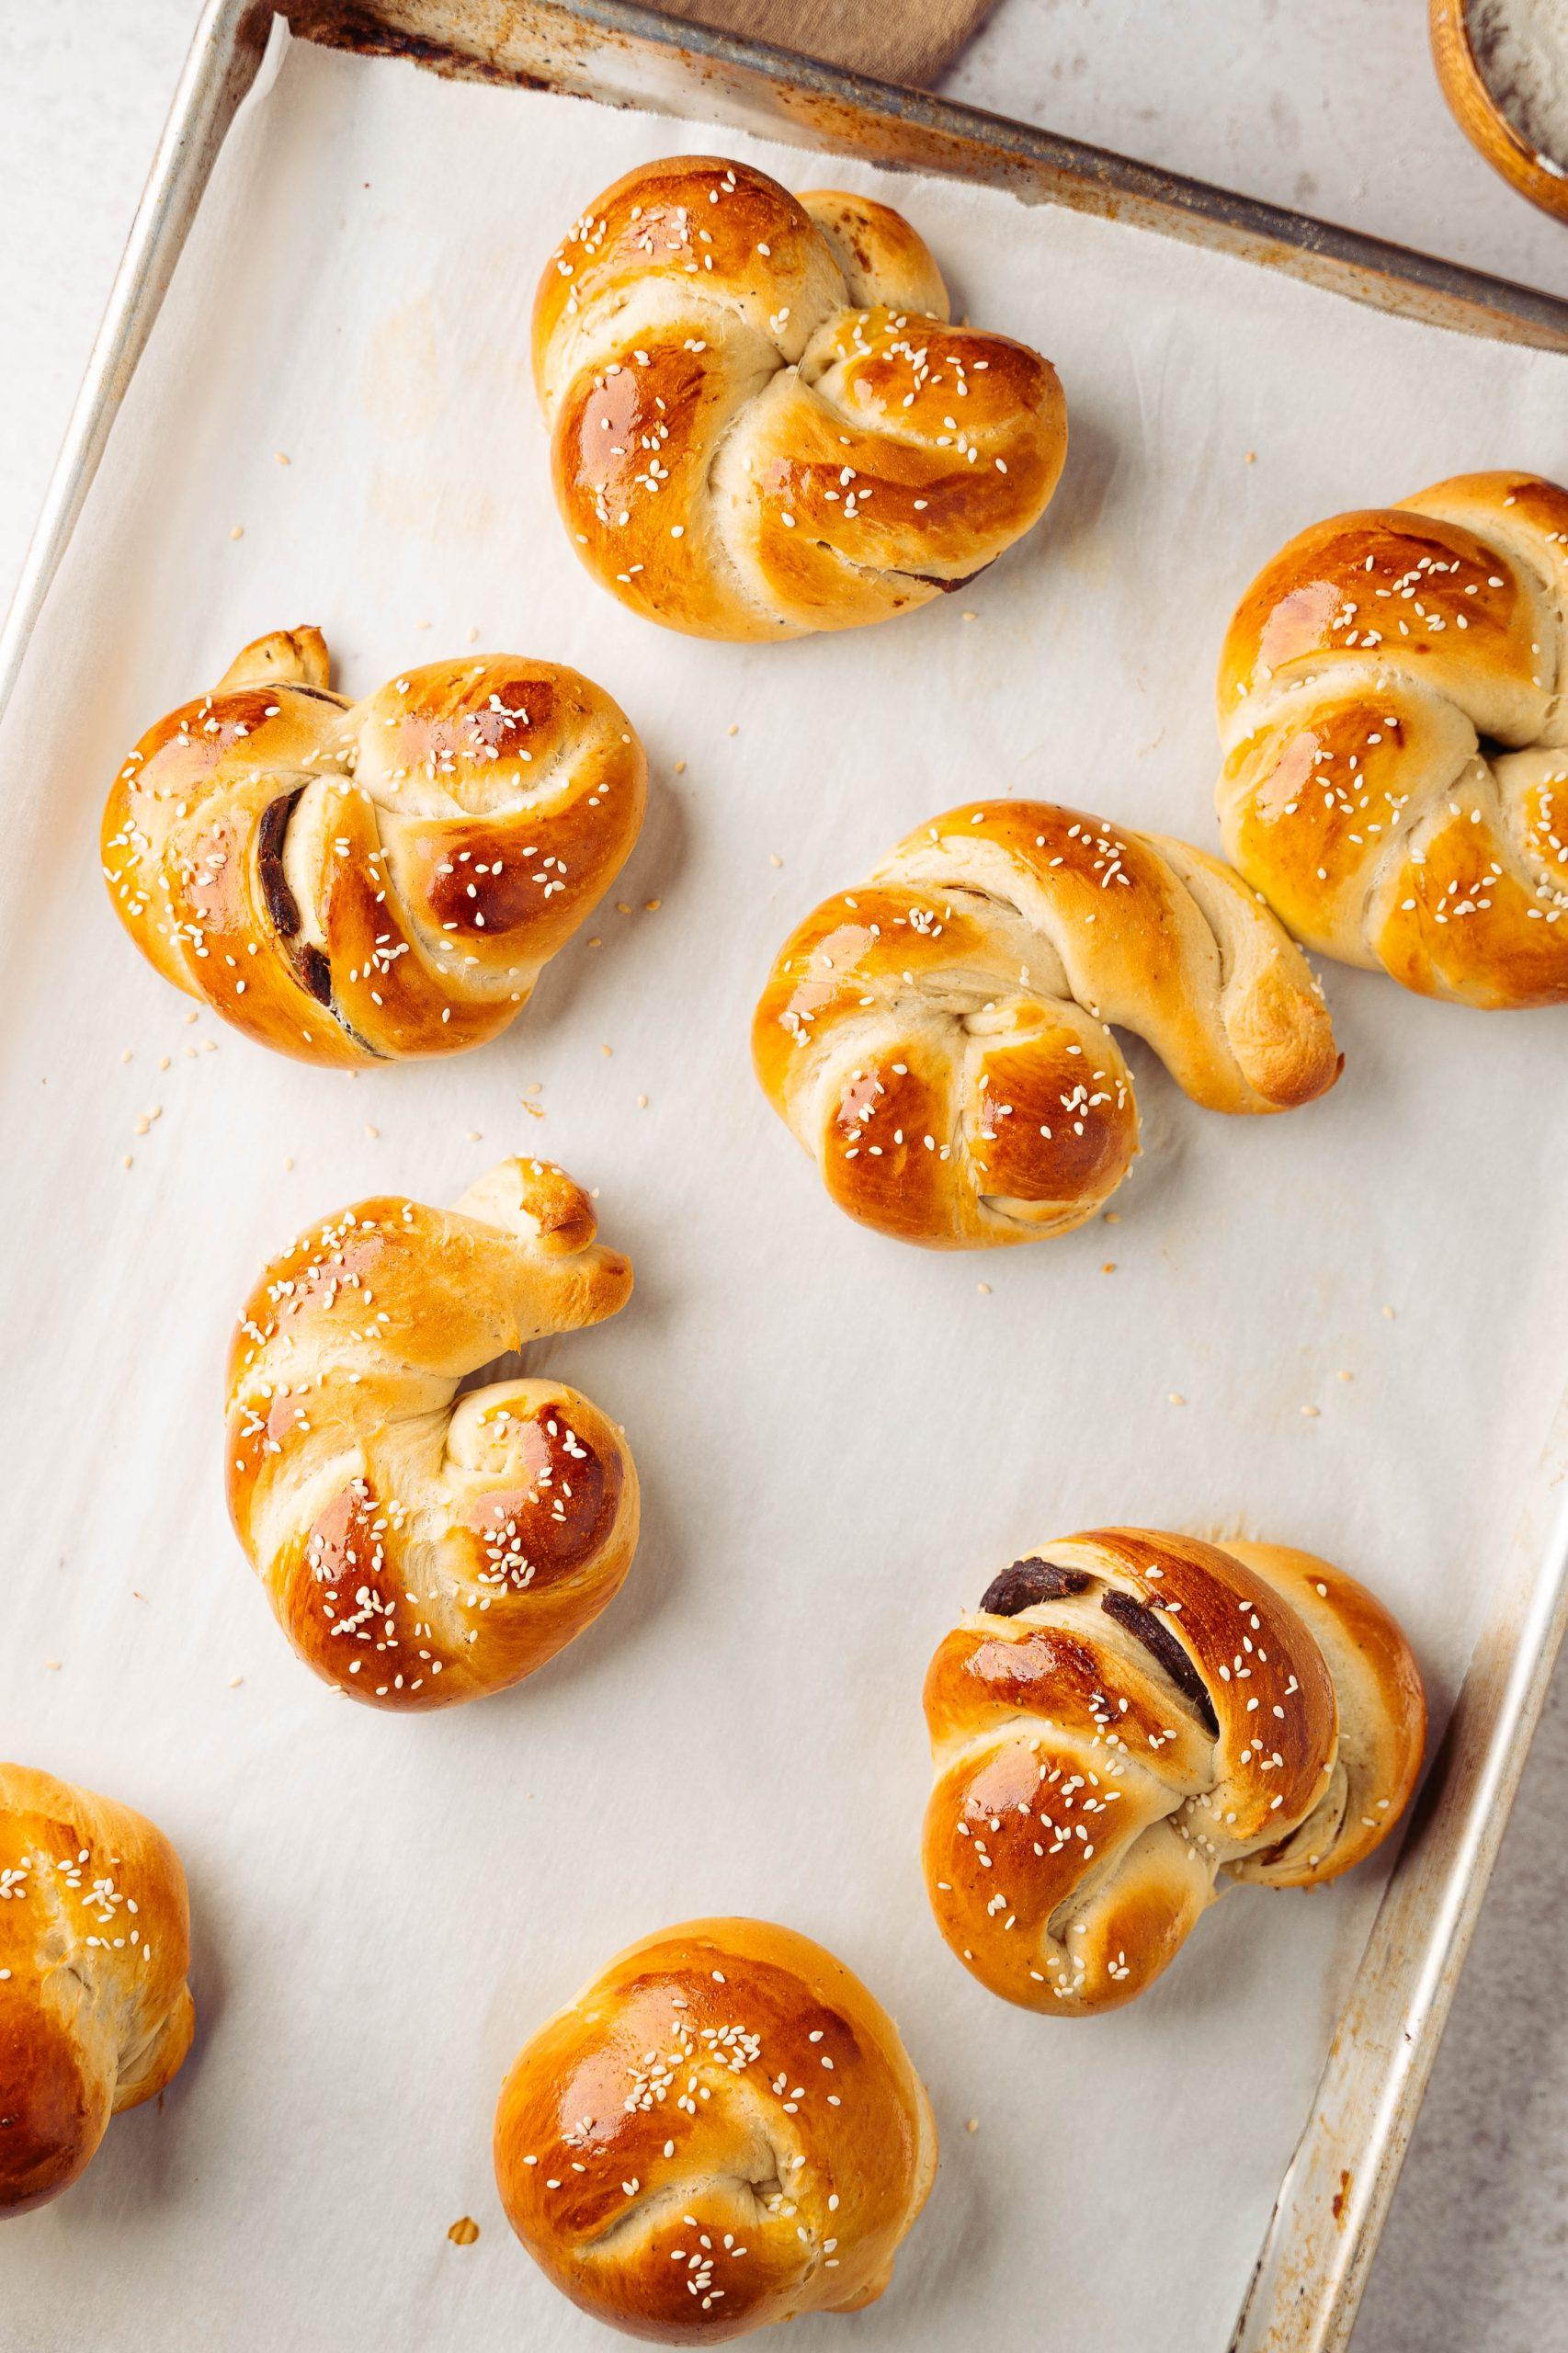
Choereg, known by various names in different Middle Eastern cultures, is a braided, sweet bread of Armenian origin. The Iraqi variation of this bread is distinct, characterized by its aromatic hint of cardamom. This slightly sweet bread is akin to a brioche, yet with its own distinct flavors, predominantly from cardamom and sesame seeds.
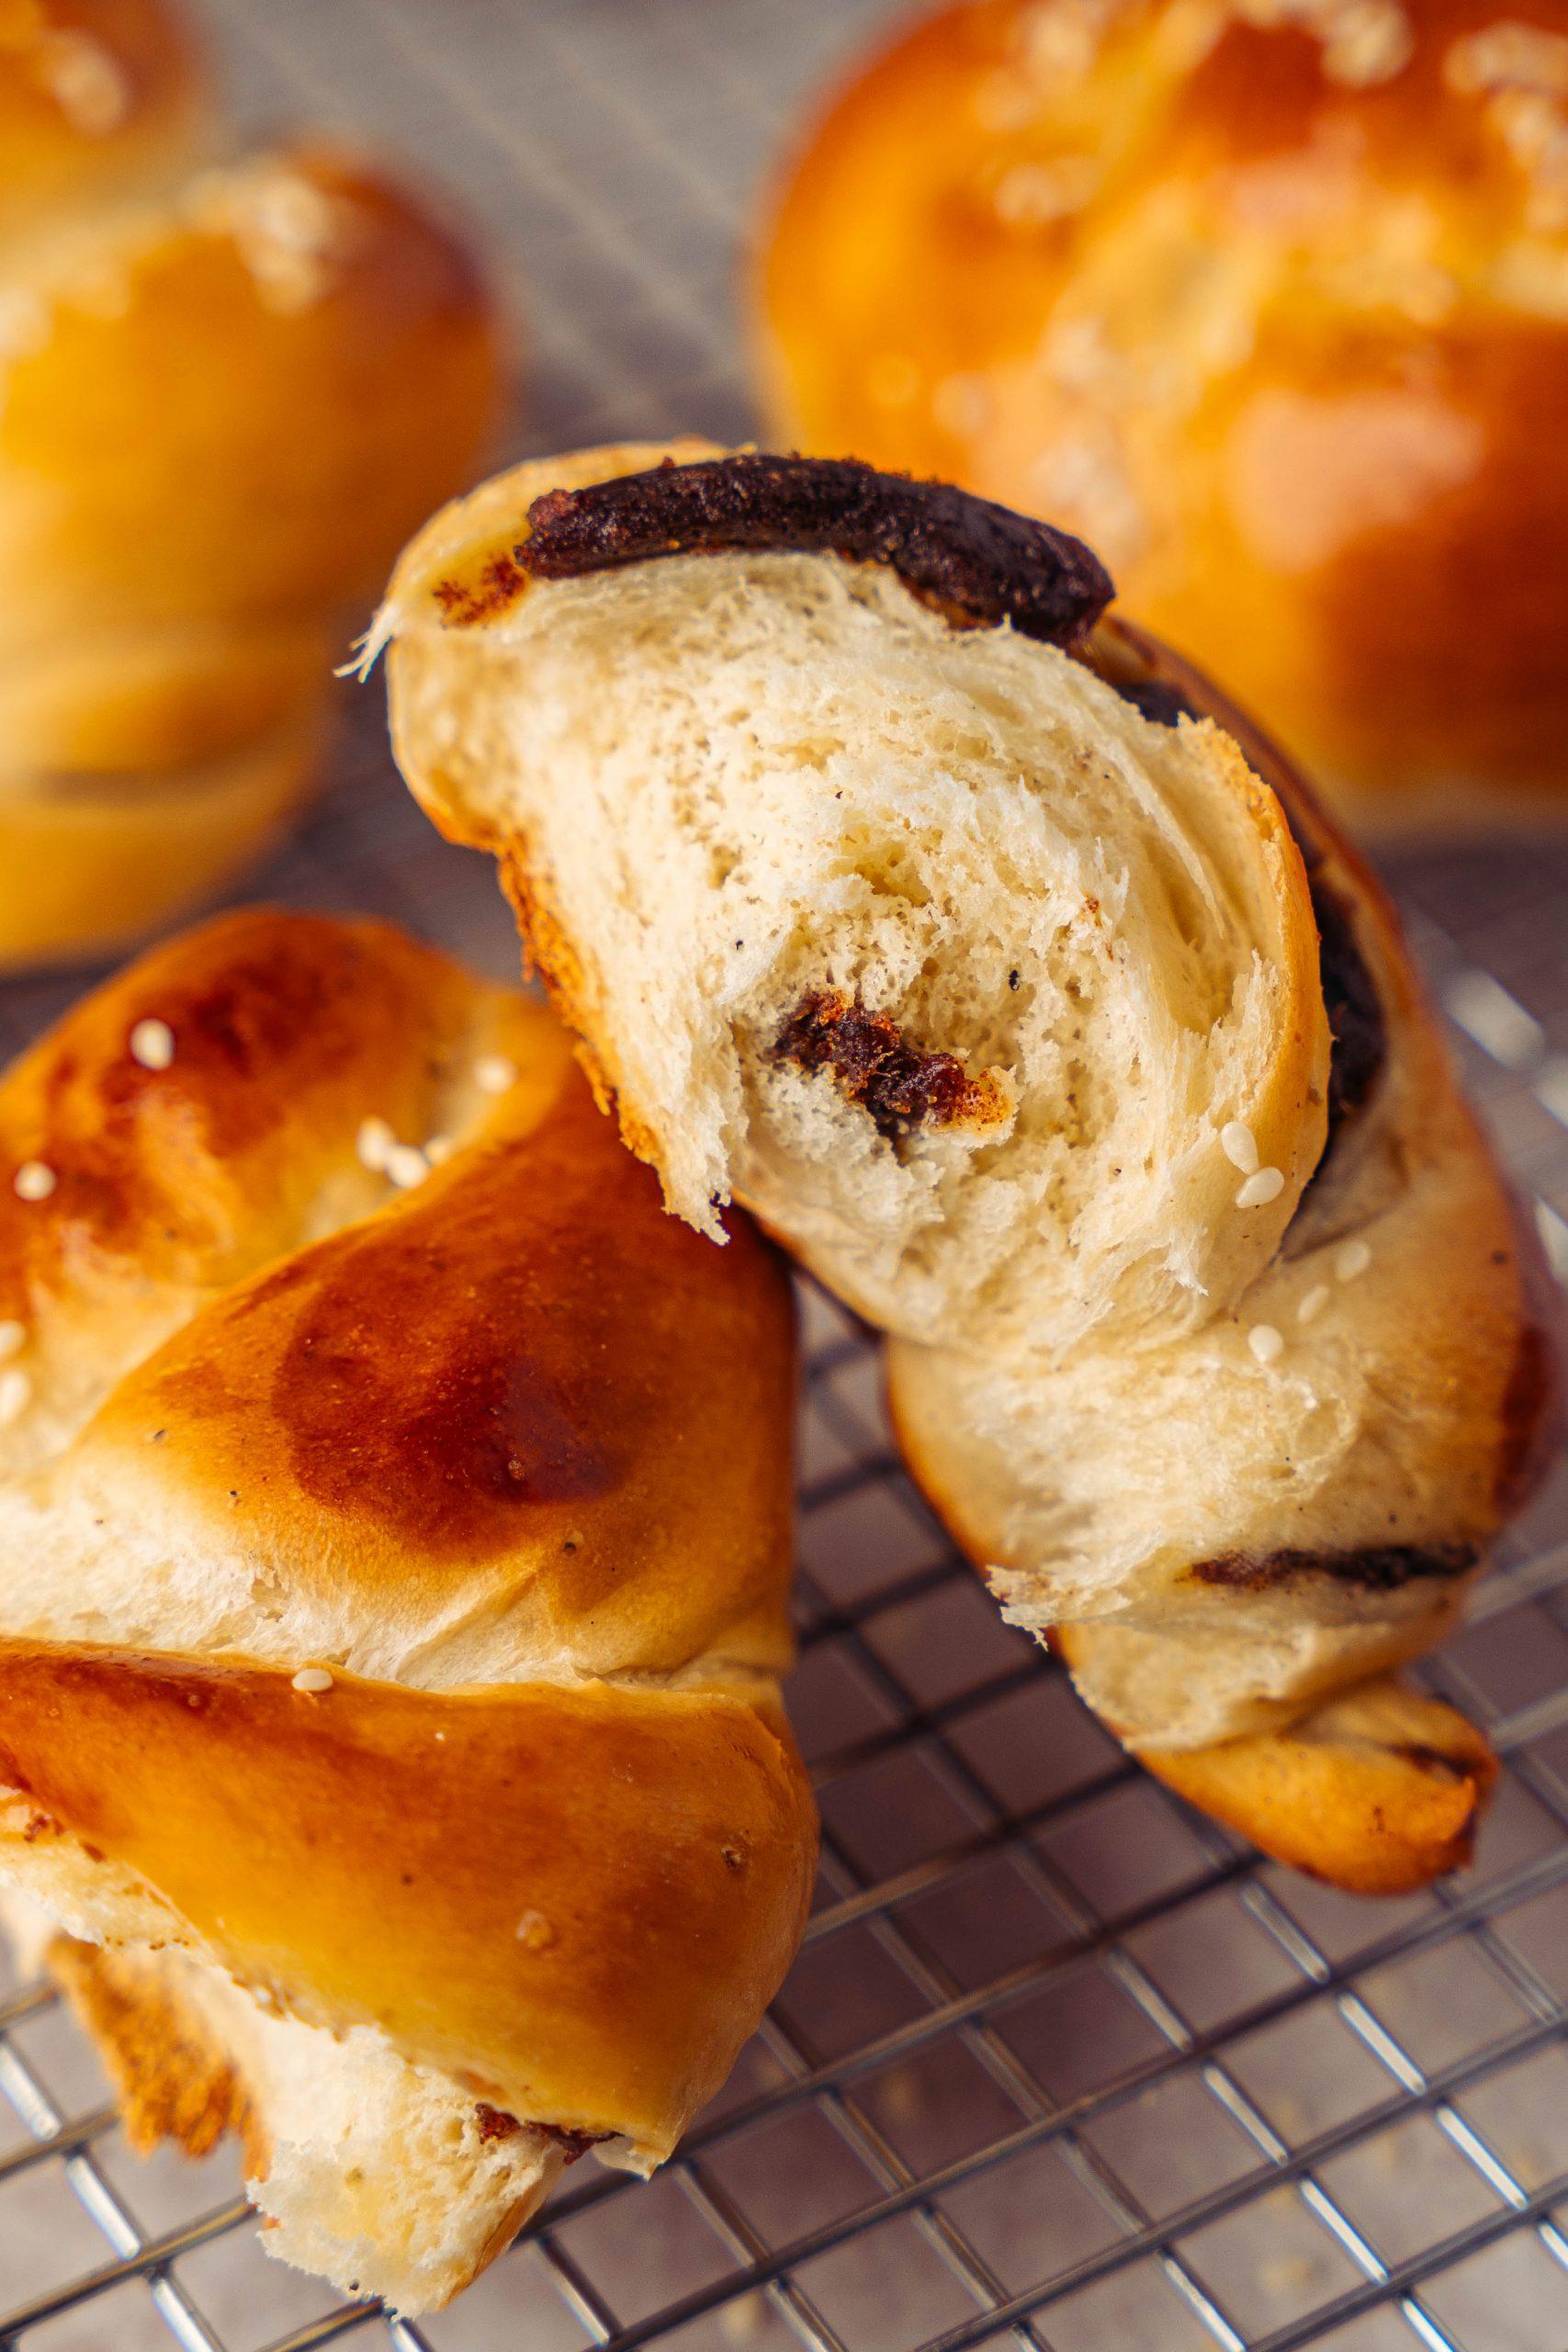
Beyond its spiced sweetness, Choereg sometimes hides an inner layer of date paste. As a staple in the middle eastern region especially Iraq for countless generations, dates complement the cardamom-infused dough, offering a delightful contrast in every bite.
During my time in Iraq, Choereg became an irresistible part of my daily rituals. Whether paired with tea or delightfully dipped into it, Its tastes are a comforting reminder of home to me. Yet, when I relocated to the US, My hunt for that recognizable flavor in international stores and bakeries was in vain. Determined to recreate the comfort of those memories, I embarked on a culinary journey, experimenting with many recipes. After much trial and taste-testing, I’ve finally crafted an authentic Choereg recipe that mirrors the essence of those I cherished in Iraqi bakeries.
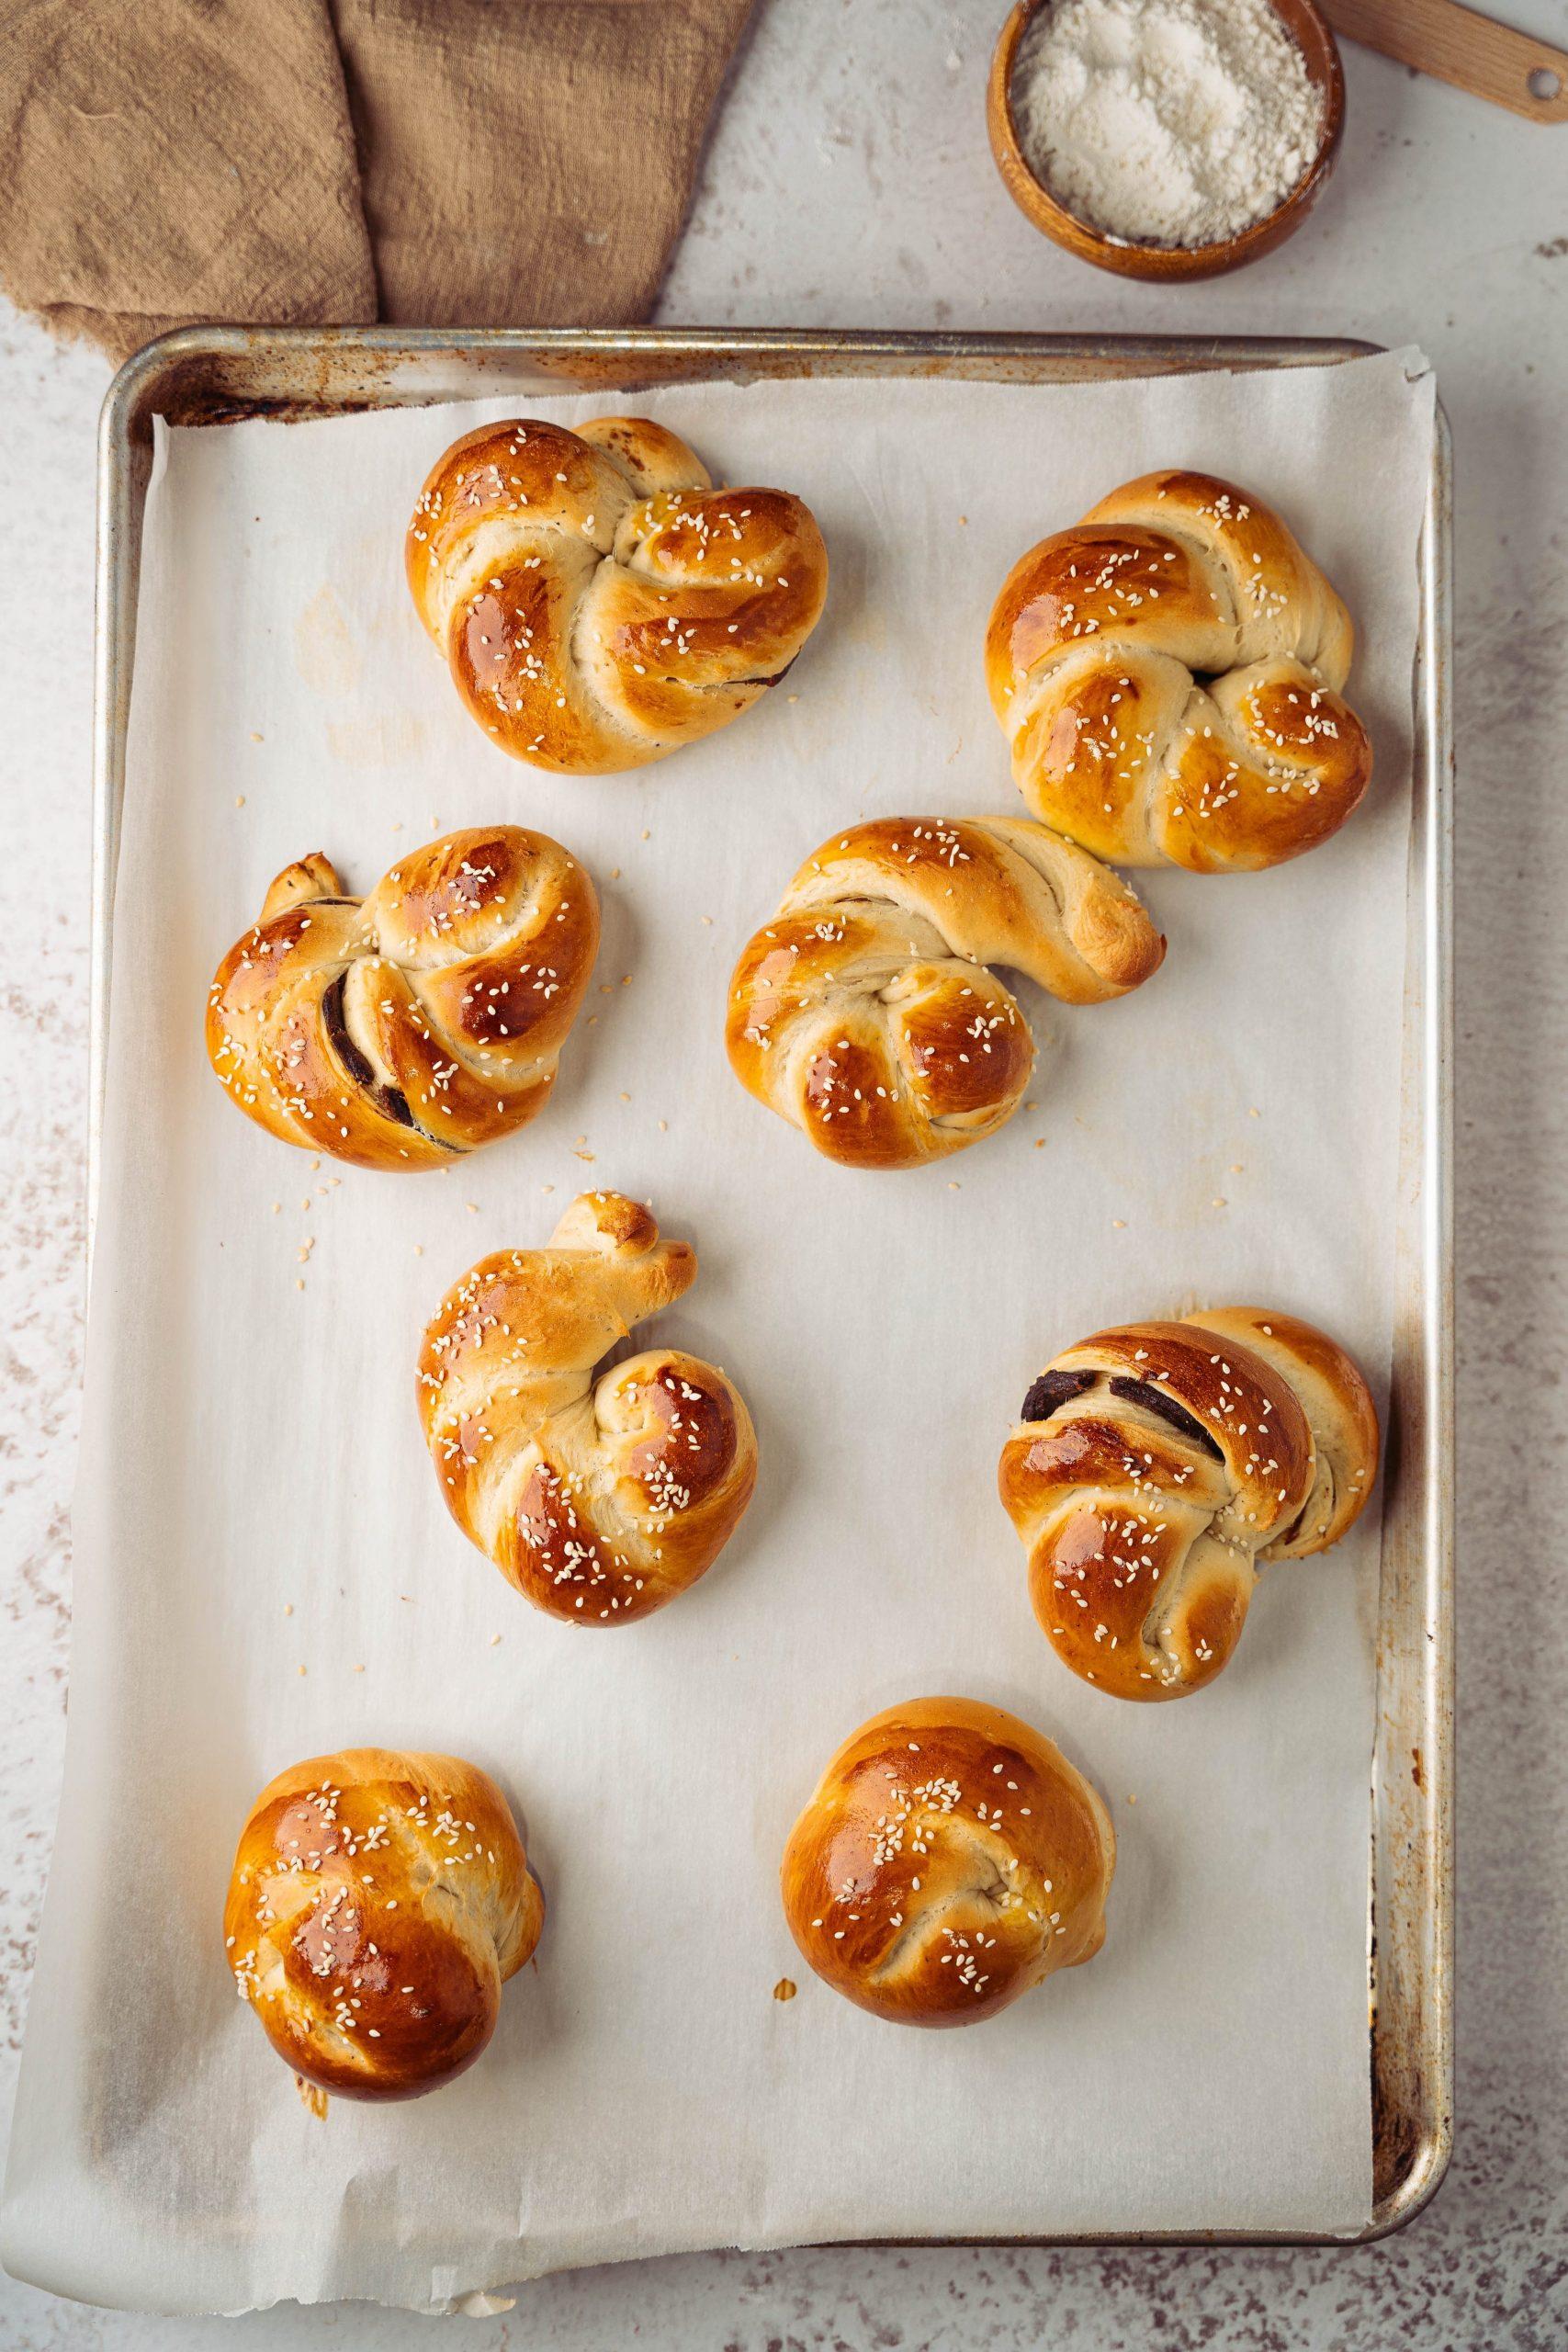
The Origin of Choereg
Choereg (pronounced “chuh-REG”) or sometimes spelled as Chorek, a sweet bread with deep Armenian roots, has been a staple for generations, particularly during festive occasions like Easter. Infused with distinctive flavors such as mahleb, it has traveled across borders and been adopted by various cultures. In Greece and Cyprus, it’s known as tsoureki and is traditionally braided, while in Turkey, it’s called çöregi. Iraq offers a unique version, enjoyed year-round with afternoon tea and flavored with cardamom. In Bulgaria, a similar bread named kolach is shaped like a ring, reminiscent of the bread’s round etymology linked to the Slavic word “kolo”, meaning ‘circle’. This global journey, with variations in names and flavors, these regional fine distinctions highlight the beautiful adaptability of food across borders and cultures.
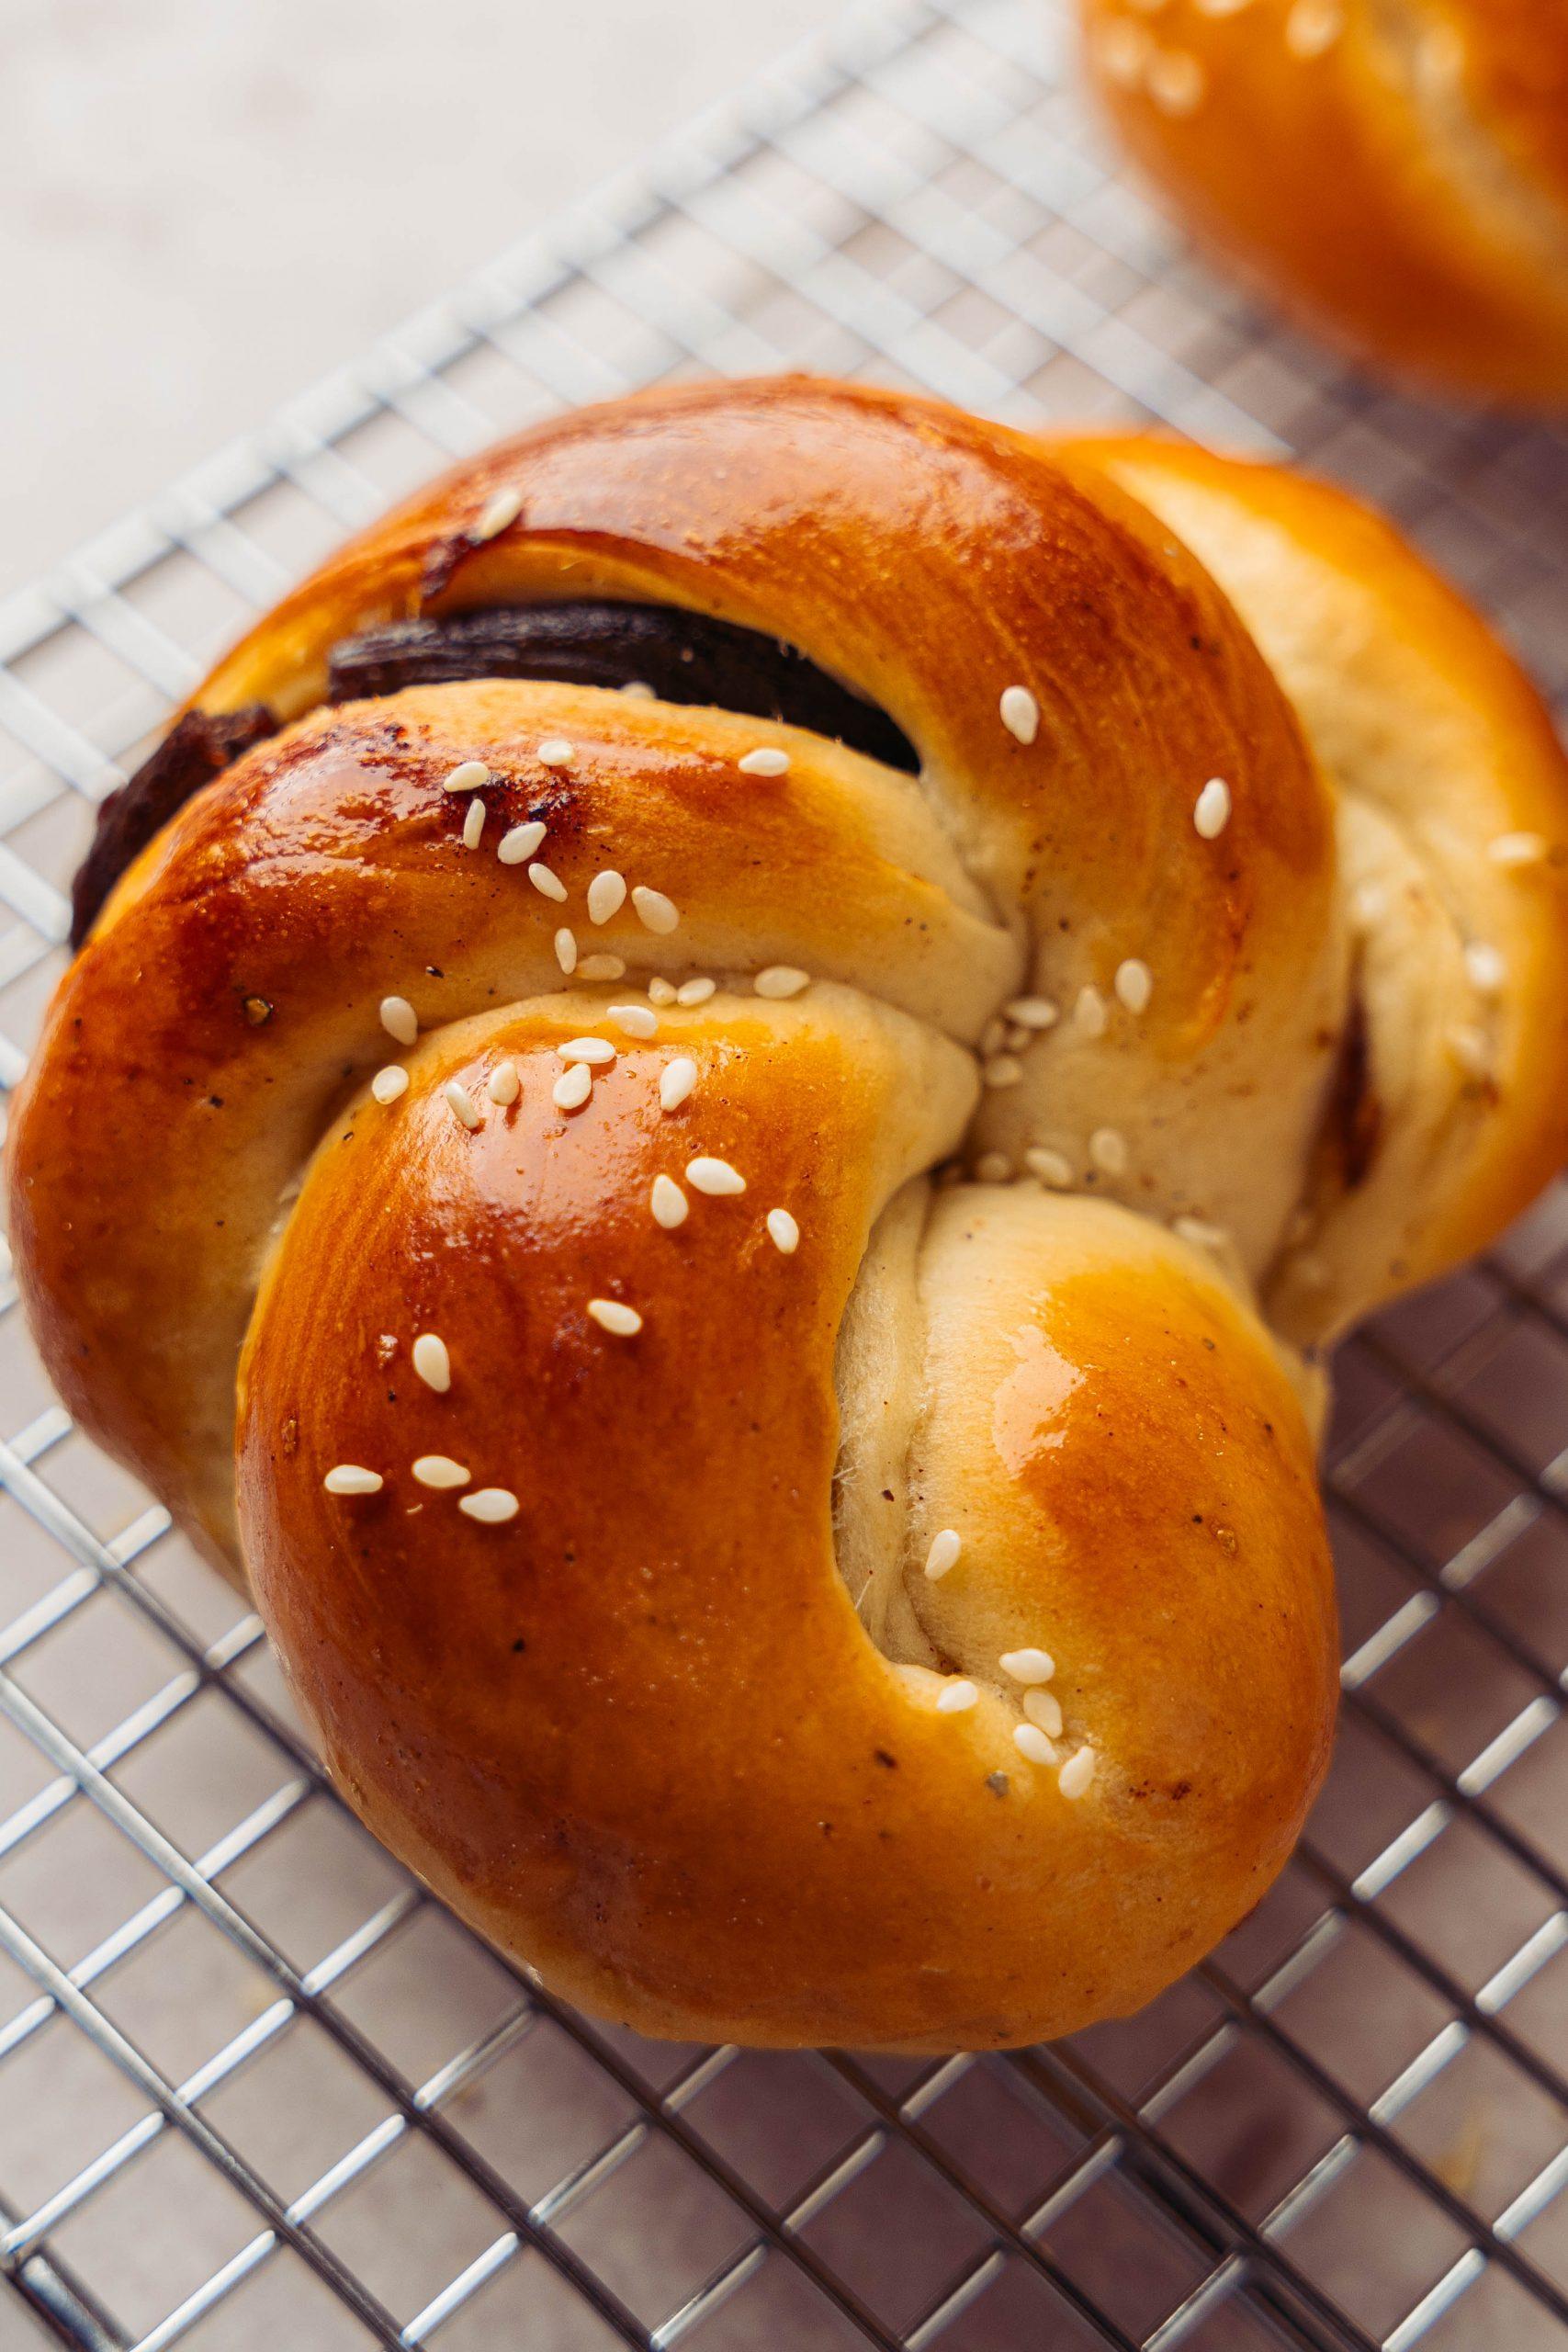
Afternoon Tea (Asronia) A Moment to Relish
In Iraq, afternoon tea is a cherished daily tradition. As the day’s pace eases, families unite, sharing tales over flavorful tea accompanied by sweet treats like Choereg, Ka’ak Abu elsimsim, or Kliecha. Occasionally, savory delicacies such as Lahm bi ajeen, Khubuz Aruk, or even Burak are also enjoyed. My personal favorite is Choereg, my undeniable weakness. When I have Choereg within reach, tea time becomes irresistible. I even enjoy dipping it into my tea on occasion, savoring the melding flavors.
Ingredients needed to make Choereg
The ingredients needed for this bread recipe is quite simple, Choereg isn’t like your usual bread. Its special dough is a bit sweet, making the bread soft, nicely golden, and super tasty. It’s what makes Choereg, well, Choereg!
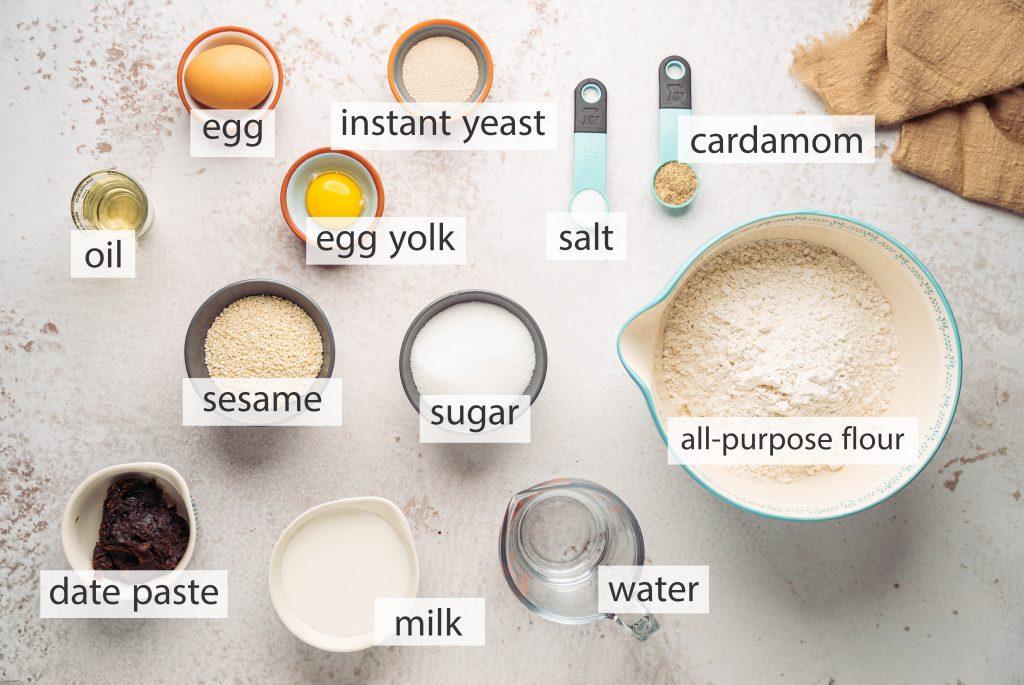
- Flour: I use all-purpose flour all the time because it’s so versatile.
- Instant Yeast: Instant yeast doesn’t need to be activated in warm water first, you can use it right away. But I always like to test it first to make sure it’s still working.
- Sugar: granulated sugar
- Egg: it’s play a role in enriching.
- Water: lukewarm water for yeast activation, temperature should be between 105-115°F
- Milk: lukewarm milk temperature same as the water.
- corn oil: or any type of oil you prefer, odorless is preferred.
- cardamom: this is a must.
- Salt: helps bring out the flavors.
- Sesame Seeds (For Topping): Toasted or not it’s up to your taste.
- Egg yolk (For Egg Wash): I like the deep golden color of Choereg skin. You can mix it with water or milk to make thinner a little bit.
- Date Paste: or as called in Arabic “Ajwa” you can find it at any Arabic store or at Amazon. If not available you can mix pitted dates with butter in food processor to make date paste.
How to make date filled Authentic Choereg at Home Step by step
- Yeast Activation:
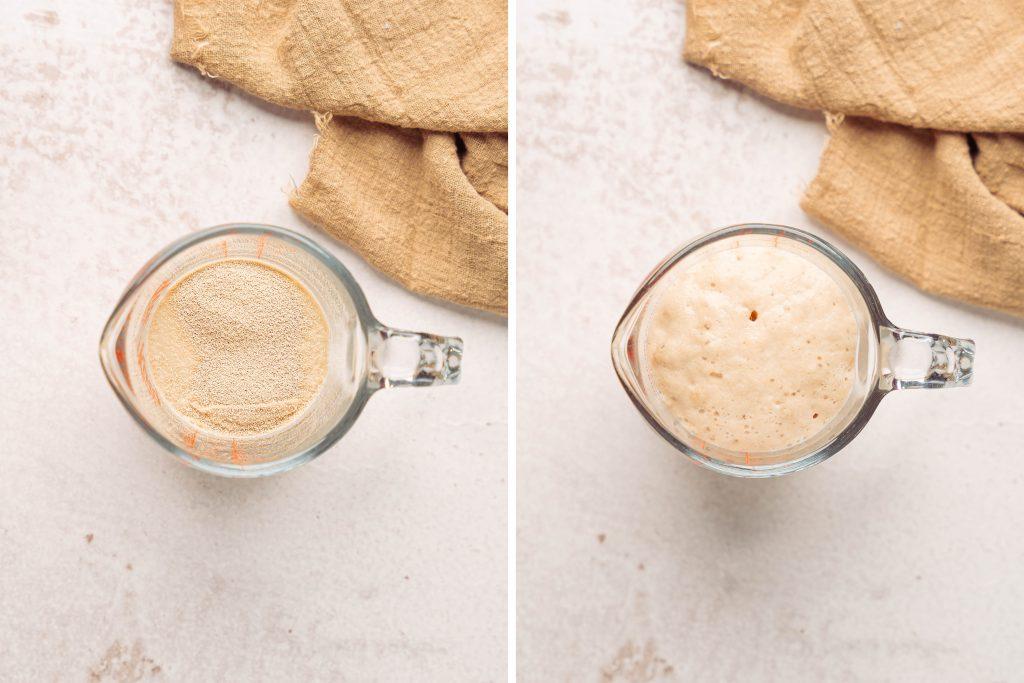
- In a small bowl, add in yeast, sugar, lukewarm water and gently stir. Allow it to sit in a warm spot for about 10 minutes, until the mixture becomes frothy.
- Dry Mixture Preparation:
- In a large mixing bowl, sift together flour, ground cardamom, and salt. I don’t usually sift my flour because most brands come pre-sifted, so it depends. Mix everything well to ensure even distribution of spices.
- Wet Mixture Combination:
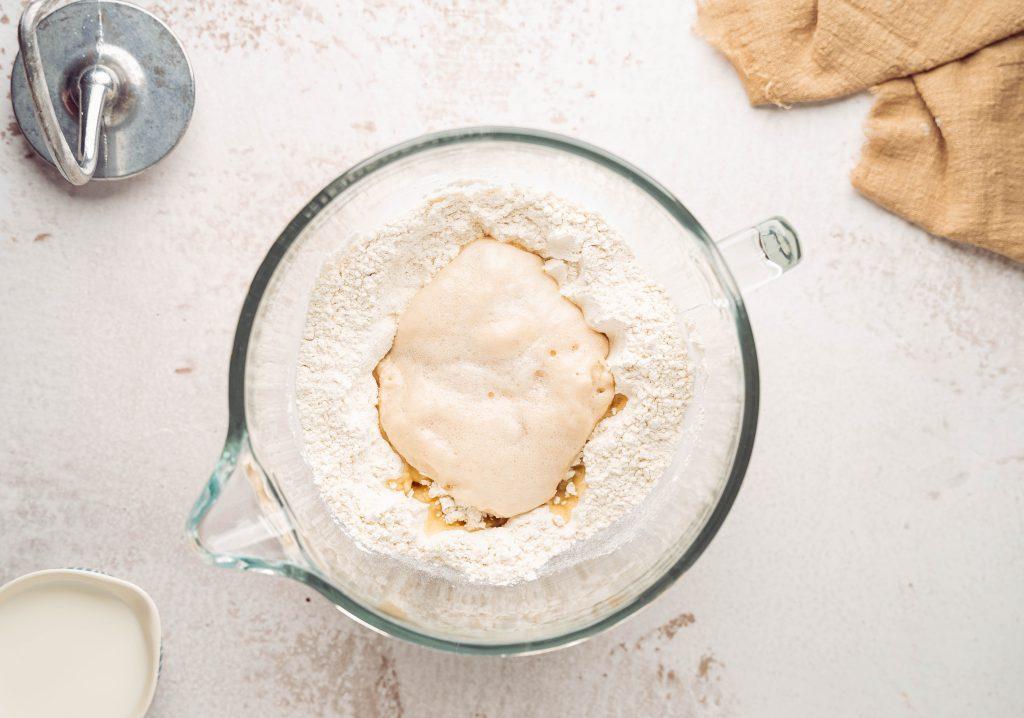
- Make a well in the center of your dry mixture. Pour in the oil and the frothy yeast mixture. Crack the egg into a separate bowl (I always do this step, so I don’t get eggshell bits in my bread, and I can easily remove them) then add it to the well.
- Dough Formation:
- If using a stand mixer:
- Attach the dough hook to your stand mixer.
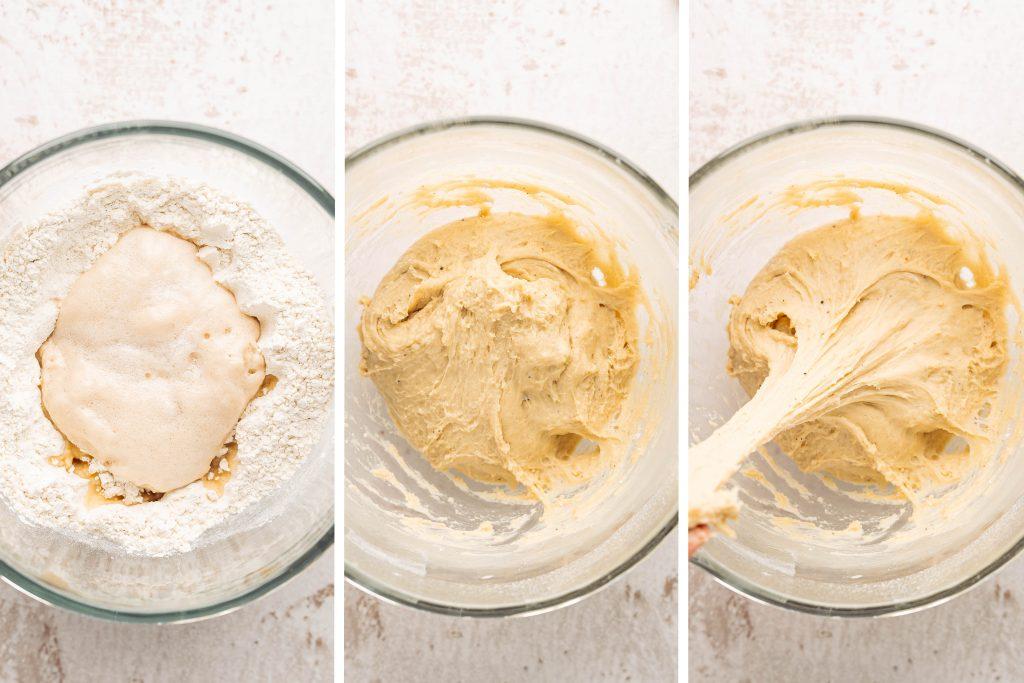
- Pour the wet ingredients into the dry ingredients in the mixer bowl.
- Mix on low speed, gradually add milk.
- keep mixing until the ingredients are combined.
- Once combined, increase the speed to medium and knead for about 7-10 minutes, or until the dough is smooth and elastic.
- If using a stand mixer:
- If kneading by hand:
- Slowly incorporate the wet ingredients into the dry ingredients, and gradually add milk, mixing continuously to form a dough.
- Once the dough begins to come together, transfer it to a lightly floured surface.
- Knead the dough for about 10-12 minutes, or until it becomes smooth and elastic. If the dough is too sticky, sprinkle in additional flour, a tablespoon at a time.
- First Rise:
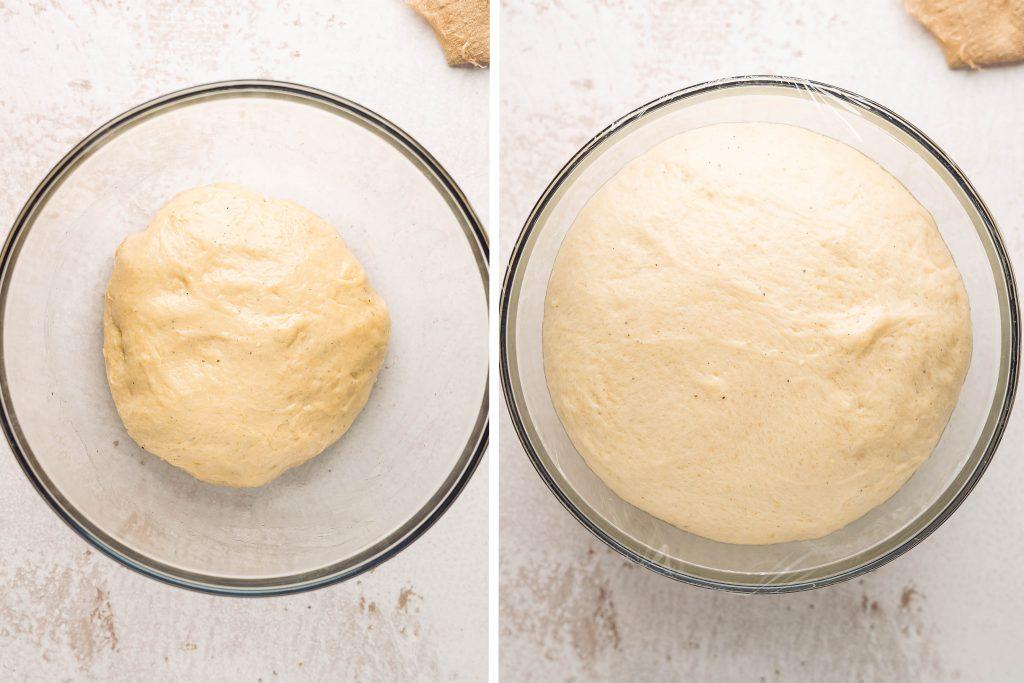
- Place the kneaded dough into a large greased bowl, covering it with a plastic wrap and a kitchen towel. Let it rise in a warm for about 2 hours, or until it has doubled in size.
- Shaping:
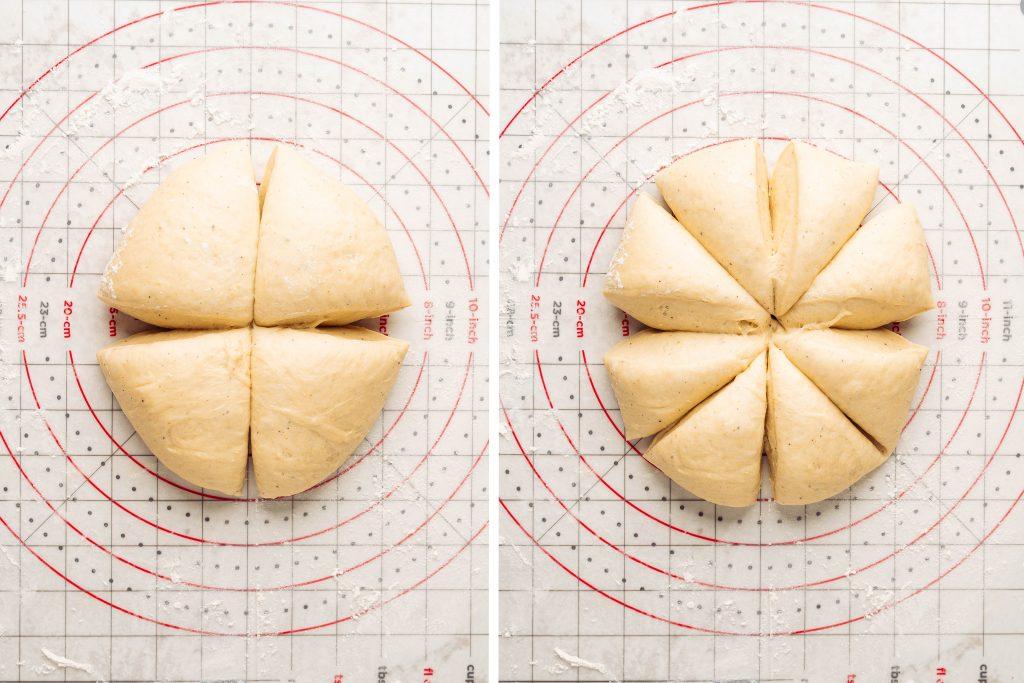
- After the dough has risen, gently deflate it to release any air bubbles. On a lightly floured surface, divide the dough into 8 equal portions.
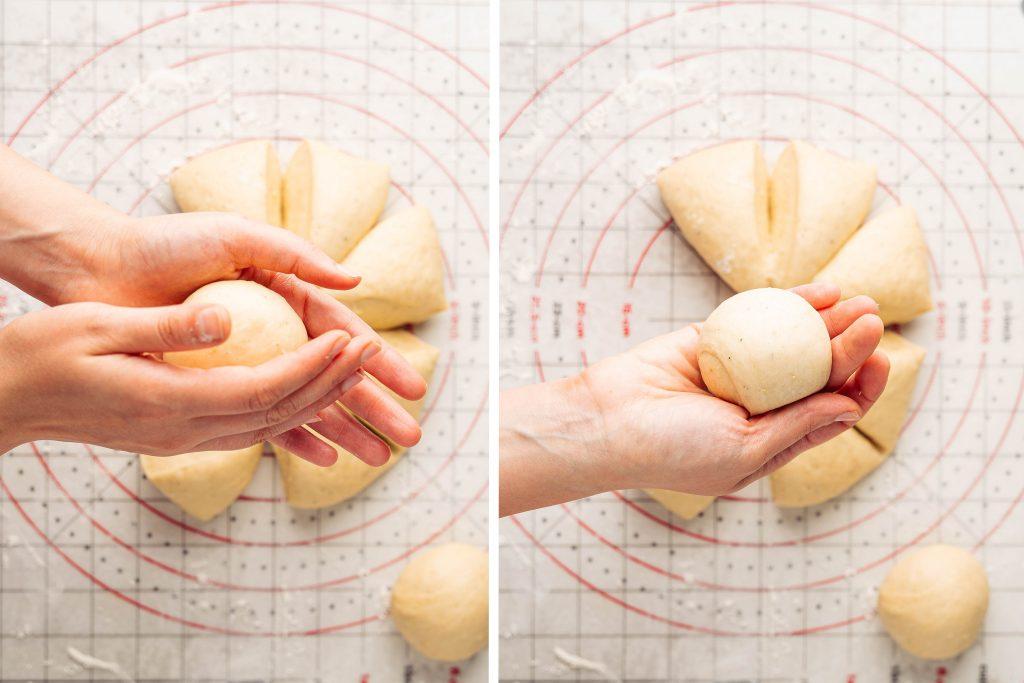
- Shape the dough portions into small balls and set them aside, covering with a towel. This ensures that the balls don’t develop a skin while you work on each one.
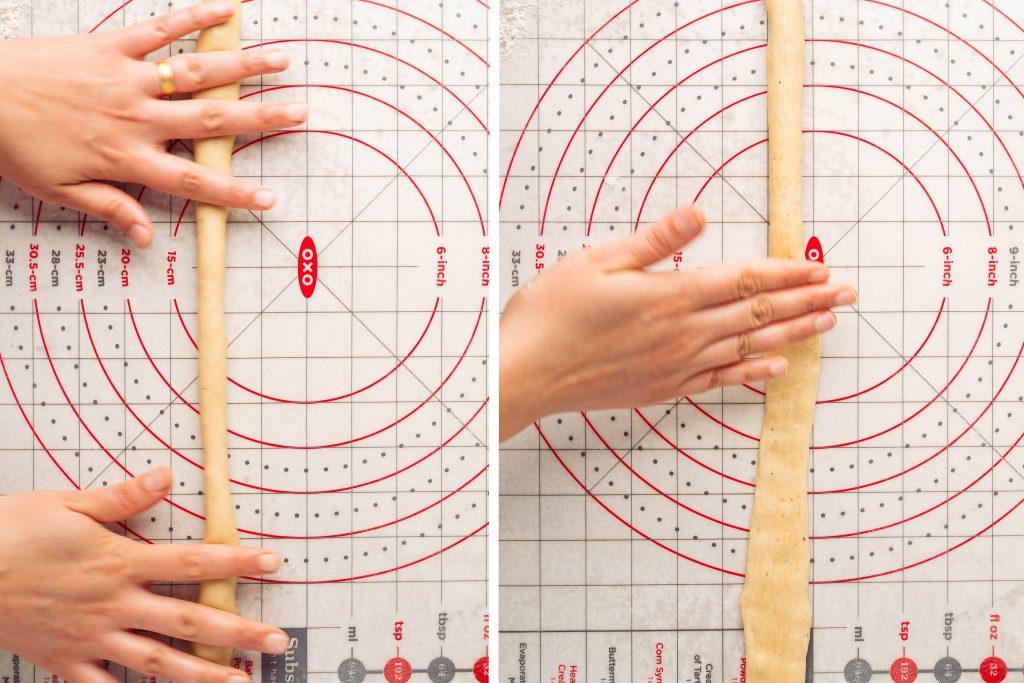
- Roll a ball into a long rope, about 1 inch in diameter.
- Take a portion of the dough and roll it into a long rope, about 1 inch in diameter.
- Flatten the rope gently with your fingers or a rolling pin.
- Spread a thin layer of date paste along the center of the flattened rope, leaving a margin on the edges.
- Fold the rope over the date paste, sealing the edges by pinching them together.
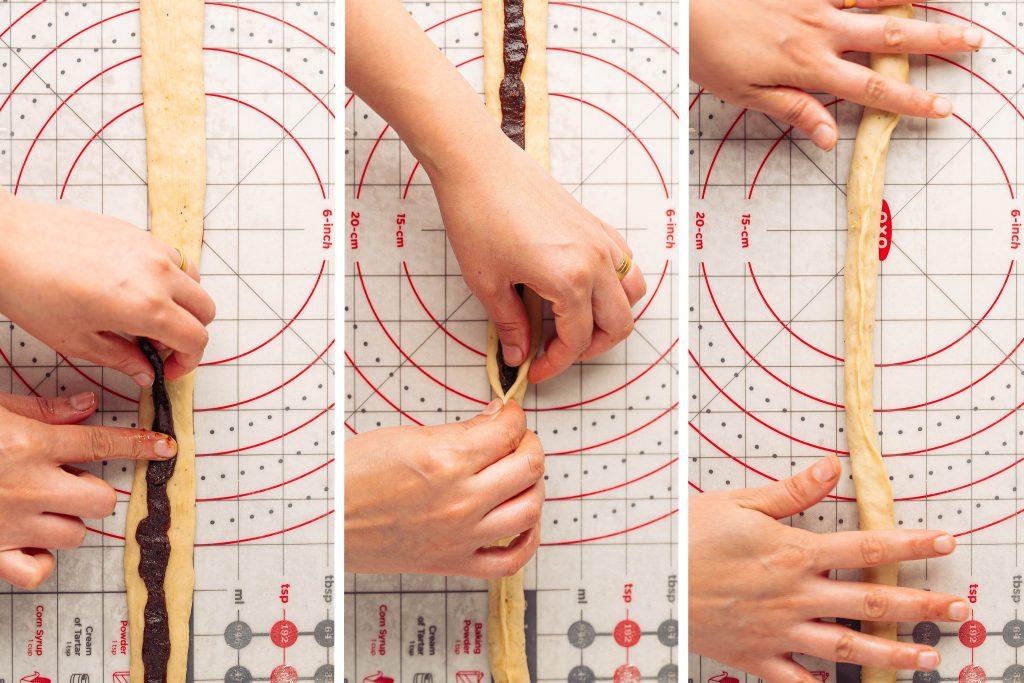
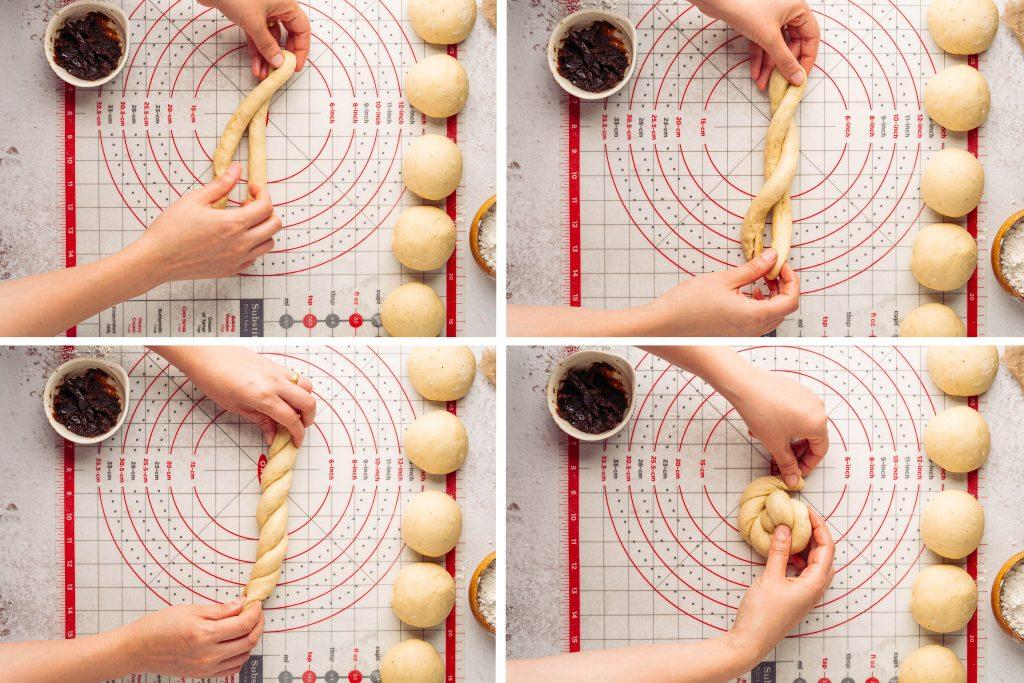
- Now, take the filled rope and fold it in the middle, then twist the two halves around each other.
- Starting from one end, roll the twisted rope around itself, forming a spiral shape. Tuck the end beneath to secure.
- Second Rise:
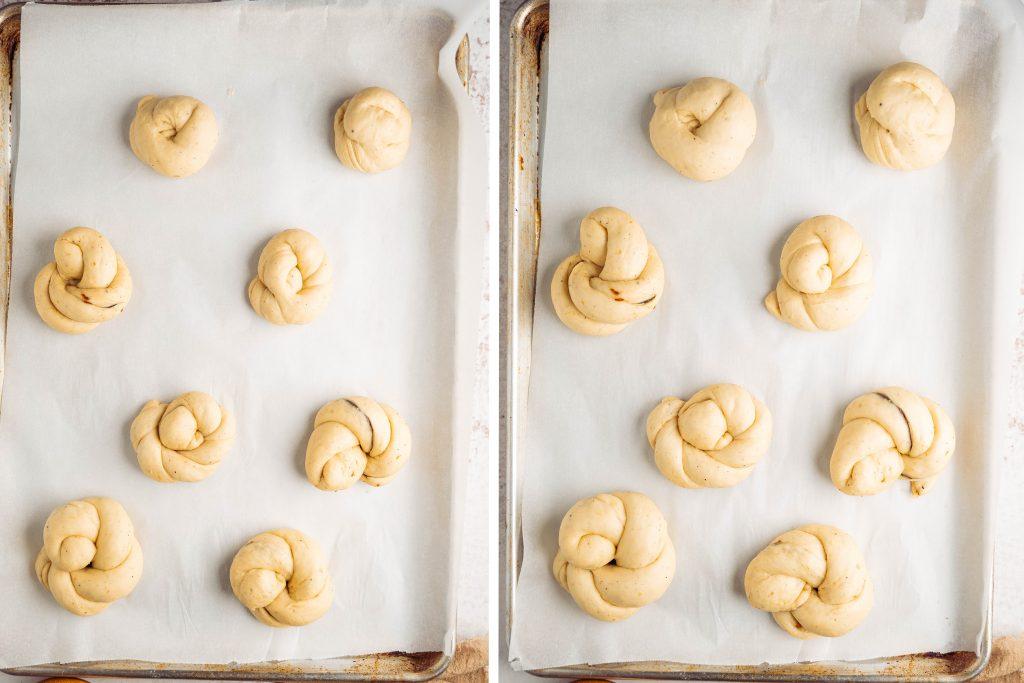
- Place the Choereg buns on a baking sheet lined with parchment paper, leaving space between each. Cover with a cloth and allow to rise for another 30 minutes.
- Preheat Oven:
- During the second rise, preheat your oven to 350°F (180°C).
- Egg Wash and Topping:
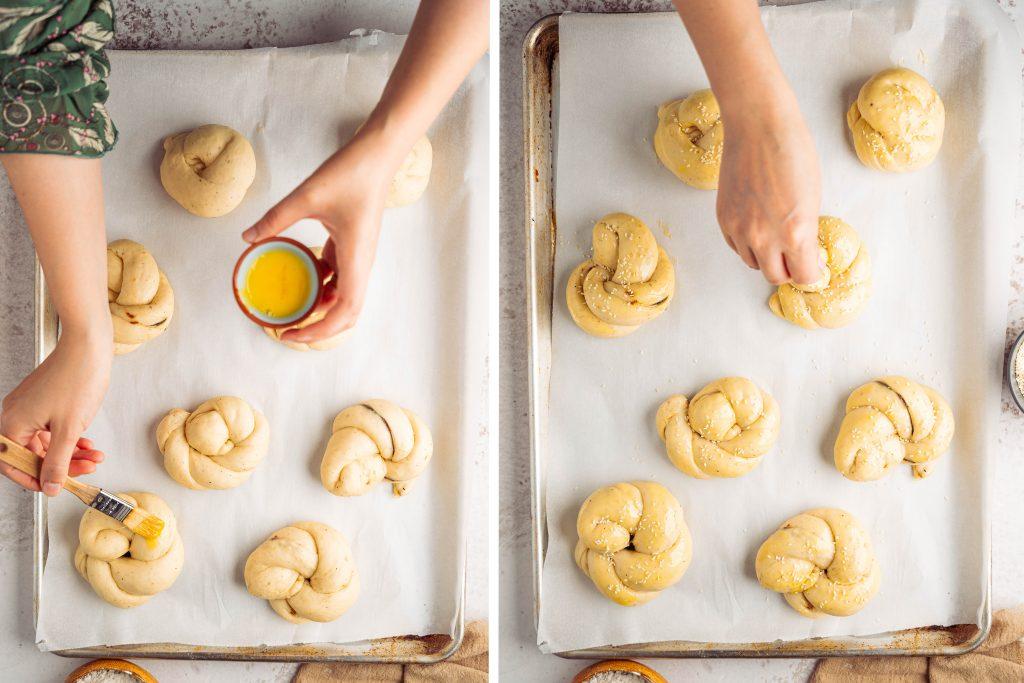
- Separate the yolk from an egg for egg wash. (and you can whisk it with a tablespoon of water or milk to create a thinner egg wash) This yolk wash will provide the Choereg buns with a deep golden and shiny finish.
- Gently brush each Choereg bun with the yolk wash, ensuring an even coating.
- After brushing, sprinkle sesame seeds generously over the top of each piece. This not only adds a beautiful texture contrast but also a slight nutty flavor to complement the sweet bread.
- Baking:
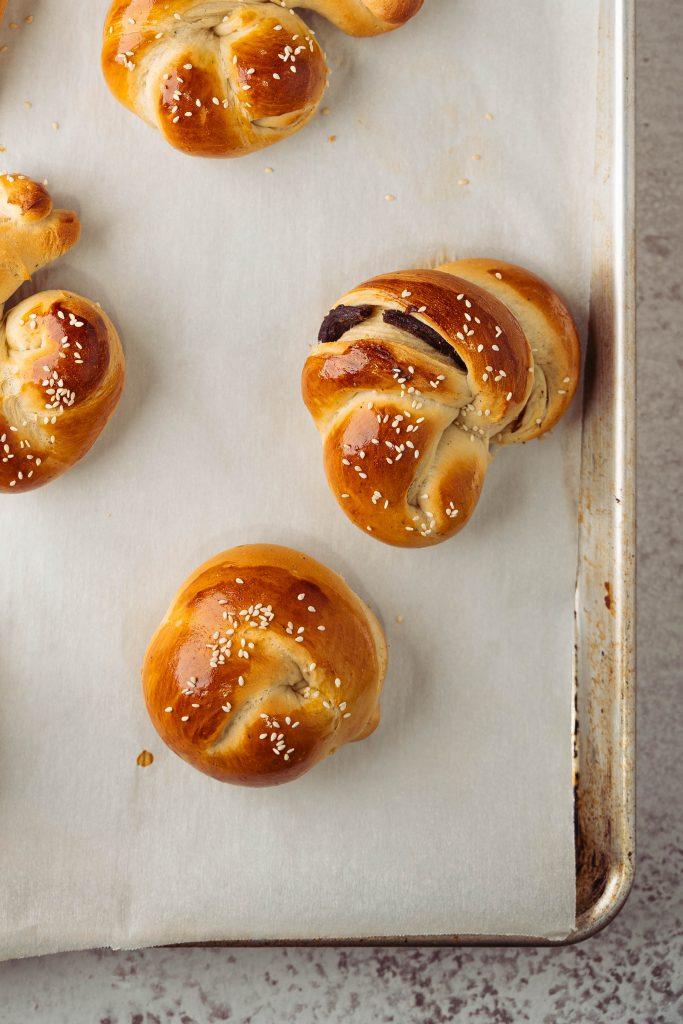
- Place the baking sheet in the preheated oven and bake for 15-18 minutes, or until the Choeregs are deep golden brown.
- Cooling:
- Once baked, remove from the oven and allow them to cool covered with towel for about 20 minutes before serving.
Notes & Tips for the Perfect Choereg
- Yeast Activation: Ensure your water is warm, not hot. Too hot, and it could kill the yeast; too cold, and the yeast might not activate. The ideal temperature is between 105-115°F or 40-45°C. The mixture should become frothy, indicating the yeast is active.
- Flour: Different brands of flour might absorb liquid differently. always add the liquid gradually. add more flour if the dough is too sticky.
- Kneading: Whether using a stand mixer or your hands, the dough should be smooth and elastic when properly kneaded. Over-kneading can make the bread tough, while under-kneading can result in a dense bread.
- Resting Time: Ensure your dough rises in a warm environment. If your kitchen is cold, an oven with the light on (but not heated) can be an ideal spot for dough to rise.
- Cardamom Quality: Use freshly ground cardamom for the best flavor.
- Date Paste: If the date paste is too thick or too sticky and hard to work with, you can warm it slightly or mix with a tiny bit of oil, to achieve a spreadable consistency and not sticking to your fingers.
- Egg Yolk Wash: For an extra shiny finish, you can brush the Choereg twice with the yolk wash – once before the final rise and once just before baking.
Here’s some recipes you might want to check out
- Lahm Bi Ajeen (A Middle Eastern Pizza)
- Middle Eastern Onion Salad
- Beef Kofta Kebab ( Middle eastern kofta )
Date Filled Choereg
Ingredients
- ¼ cup lukewarm water
- 1 tbsp instant yeast
- ½ cup Sugar + 1 tbsp for yeast
- 3 cups all purpose flour
- 1 large egg
- ¾ cup lukewarm milk
- 2 tbsp corn oil
- ½ tsp salt
- 1 tsp cardamom
Filling
- Date Paste
- Corn oil
Topping
- 1 egg yolk
- Sesame Seeds
Instructions
- In small bowl add in the yeast, sugar and the lukewarm water. Let it sit for about 10 minutes until it becomes frothy.
- In a large bowl, combine flour, Cardamom, and salt.
- Slowly incorporate the yeast mixture, oil, and egg into the flour mixture. Gradually add milk and Knead for about 10-12 minutes, or until it's smooth and elastic.
- Place the dough in a greased bowl, cover, and let it rise for about 2 hours or until double in size.
- Gently deflate it to release any air bubbles. Divide the dough into small balls. roll a ball into a long rope, about 1 inch in diameter.
- Flatten the rope gently with your fingers or a rolling pin. Spread a thin layer of date paste along the center of the flattened rope, leaving a margin on the edges.
- Fold the rope over the date paste, sealing the edges by pinching them together.
- take the filled rope and fold it in the middle, then twist the two halves around each other.
- Starting from one end, roll the twisted rope around itself, forming a spiral shape. Tuck the end beneath to secure.
- Place the Choereg buns on a baking sheet lined with parchment paper, leaving space between each. Cover with a cloth and allow to rise for another 30 minutes.
- During the second rise, preheat your oven to 350°F (180°C).
- Gently brush each Choereg bun with the yolk wash, ensuring an even coating.
- Sprinkle sesame seeds generously over the top of each piece.
- Bake for 15-18 minutes or until Choereg is golden brown.
- Once baked, remove from the oven and allow them to cool covered with towel for about 20 minutes before serving.
Notes
- Storage: Store the Choereg in an airtight container to keep it fresh. If you plan to consume it over several days, you can reheat it slightly before serving to revive its freshness.
- Freezing: If you wish to make a bigger batch, Choereg freezes wonderfully. Once cooled, individually wrap them in plastic wrap and store in a freezer-safe bag. When ready to eat, thaw at room temperature and warm slightly in the oven.
- Experimentation: Feel free to experiment with the filling. Walnuts, pistachios, or even a hint of orange zest can add a delightful twist to the traditional recipe.


